Bicycle connecting rod: how to change and remove, installation, how to unscrew. Easy way to remove the connecting rods from the bike
Shared
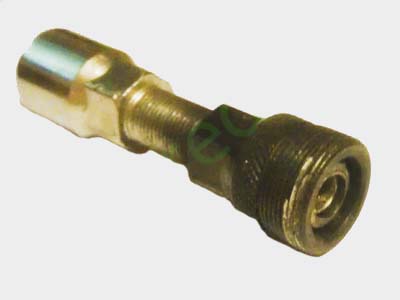
In order to replace the connecting rods and the bicycle system, we need a special connecting rod puller (there are several types of pullers, in this case I use a square puller. Cranks for carriages with a square section are the most common and are found on bicycles of low and medium price groups), hexagons and an adjustable wrench.
Photo of the puller under the square carriage:
Getting down to removing the connecting rod with the stars
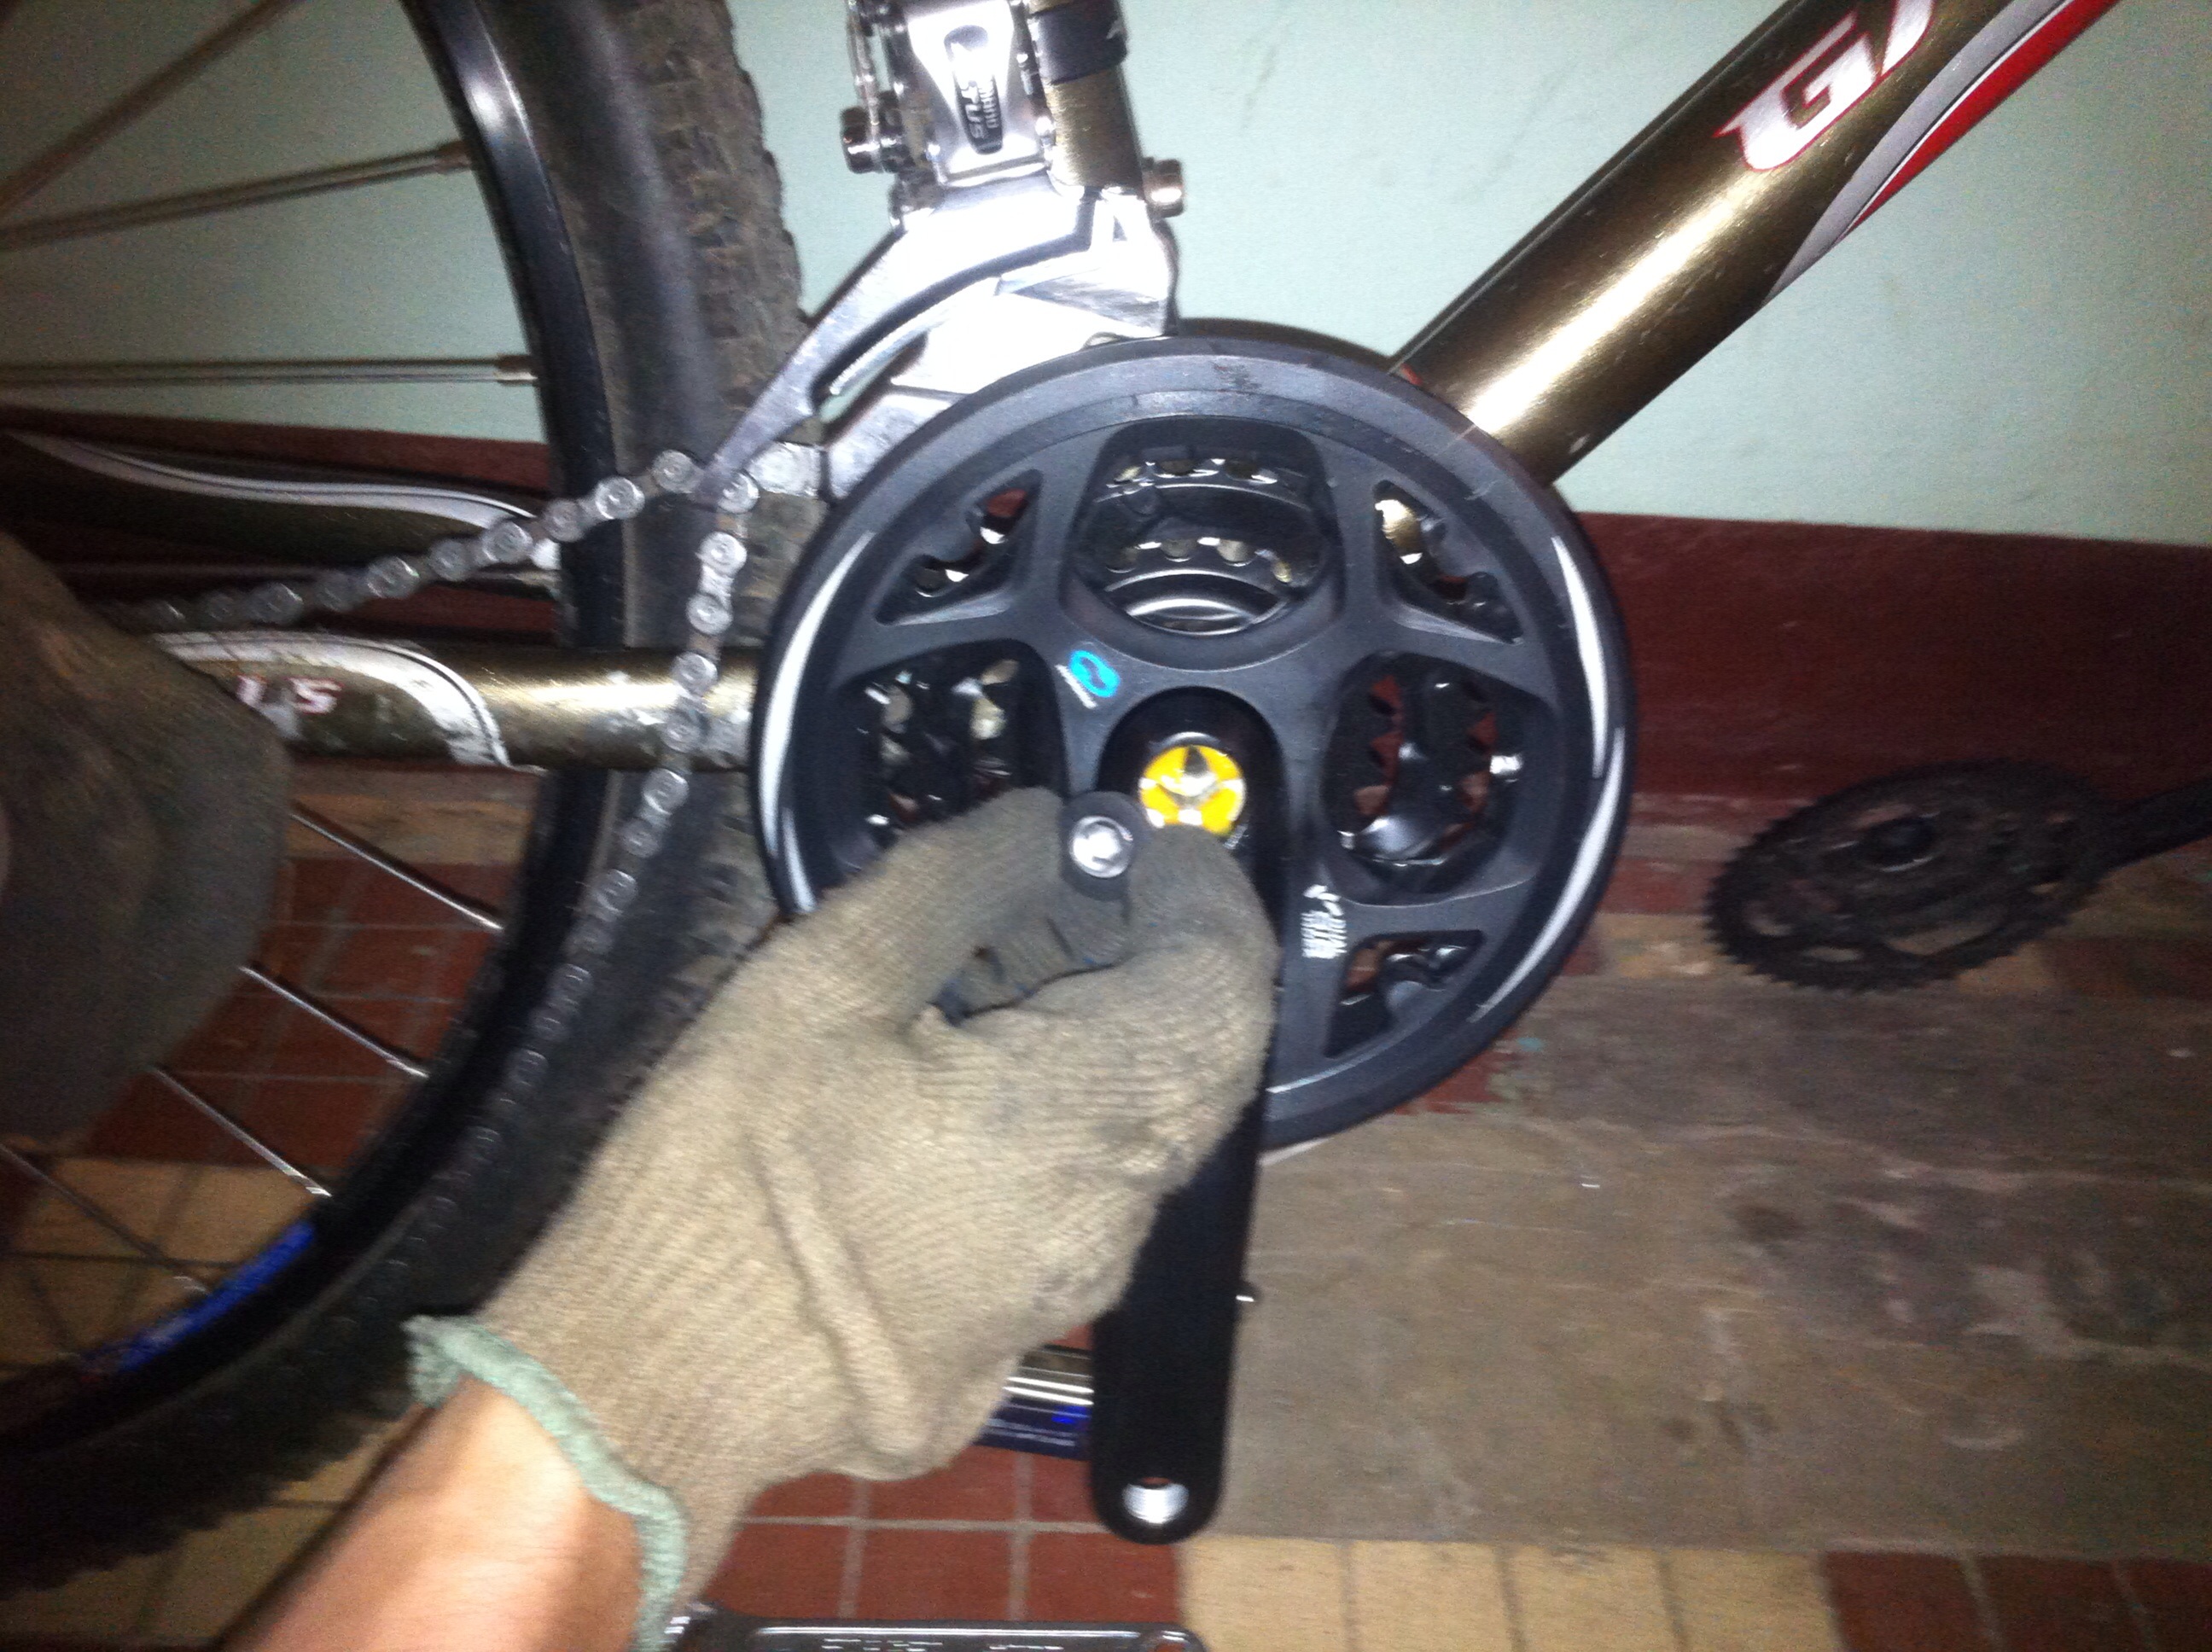
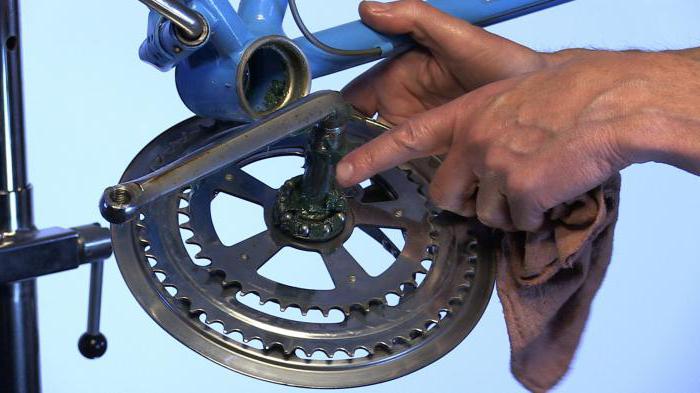
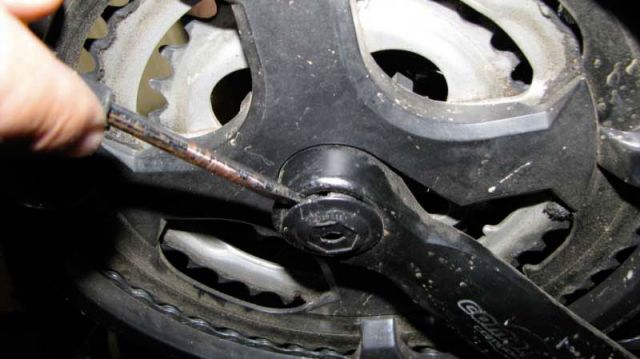
1. Unscrew the clamping screw. It is he who holds the connecting rod in place and does not allow it to fly off.
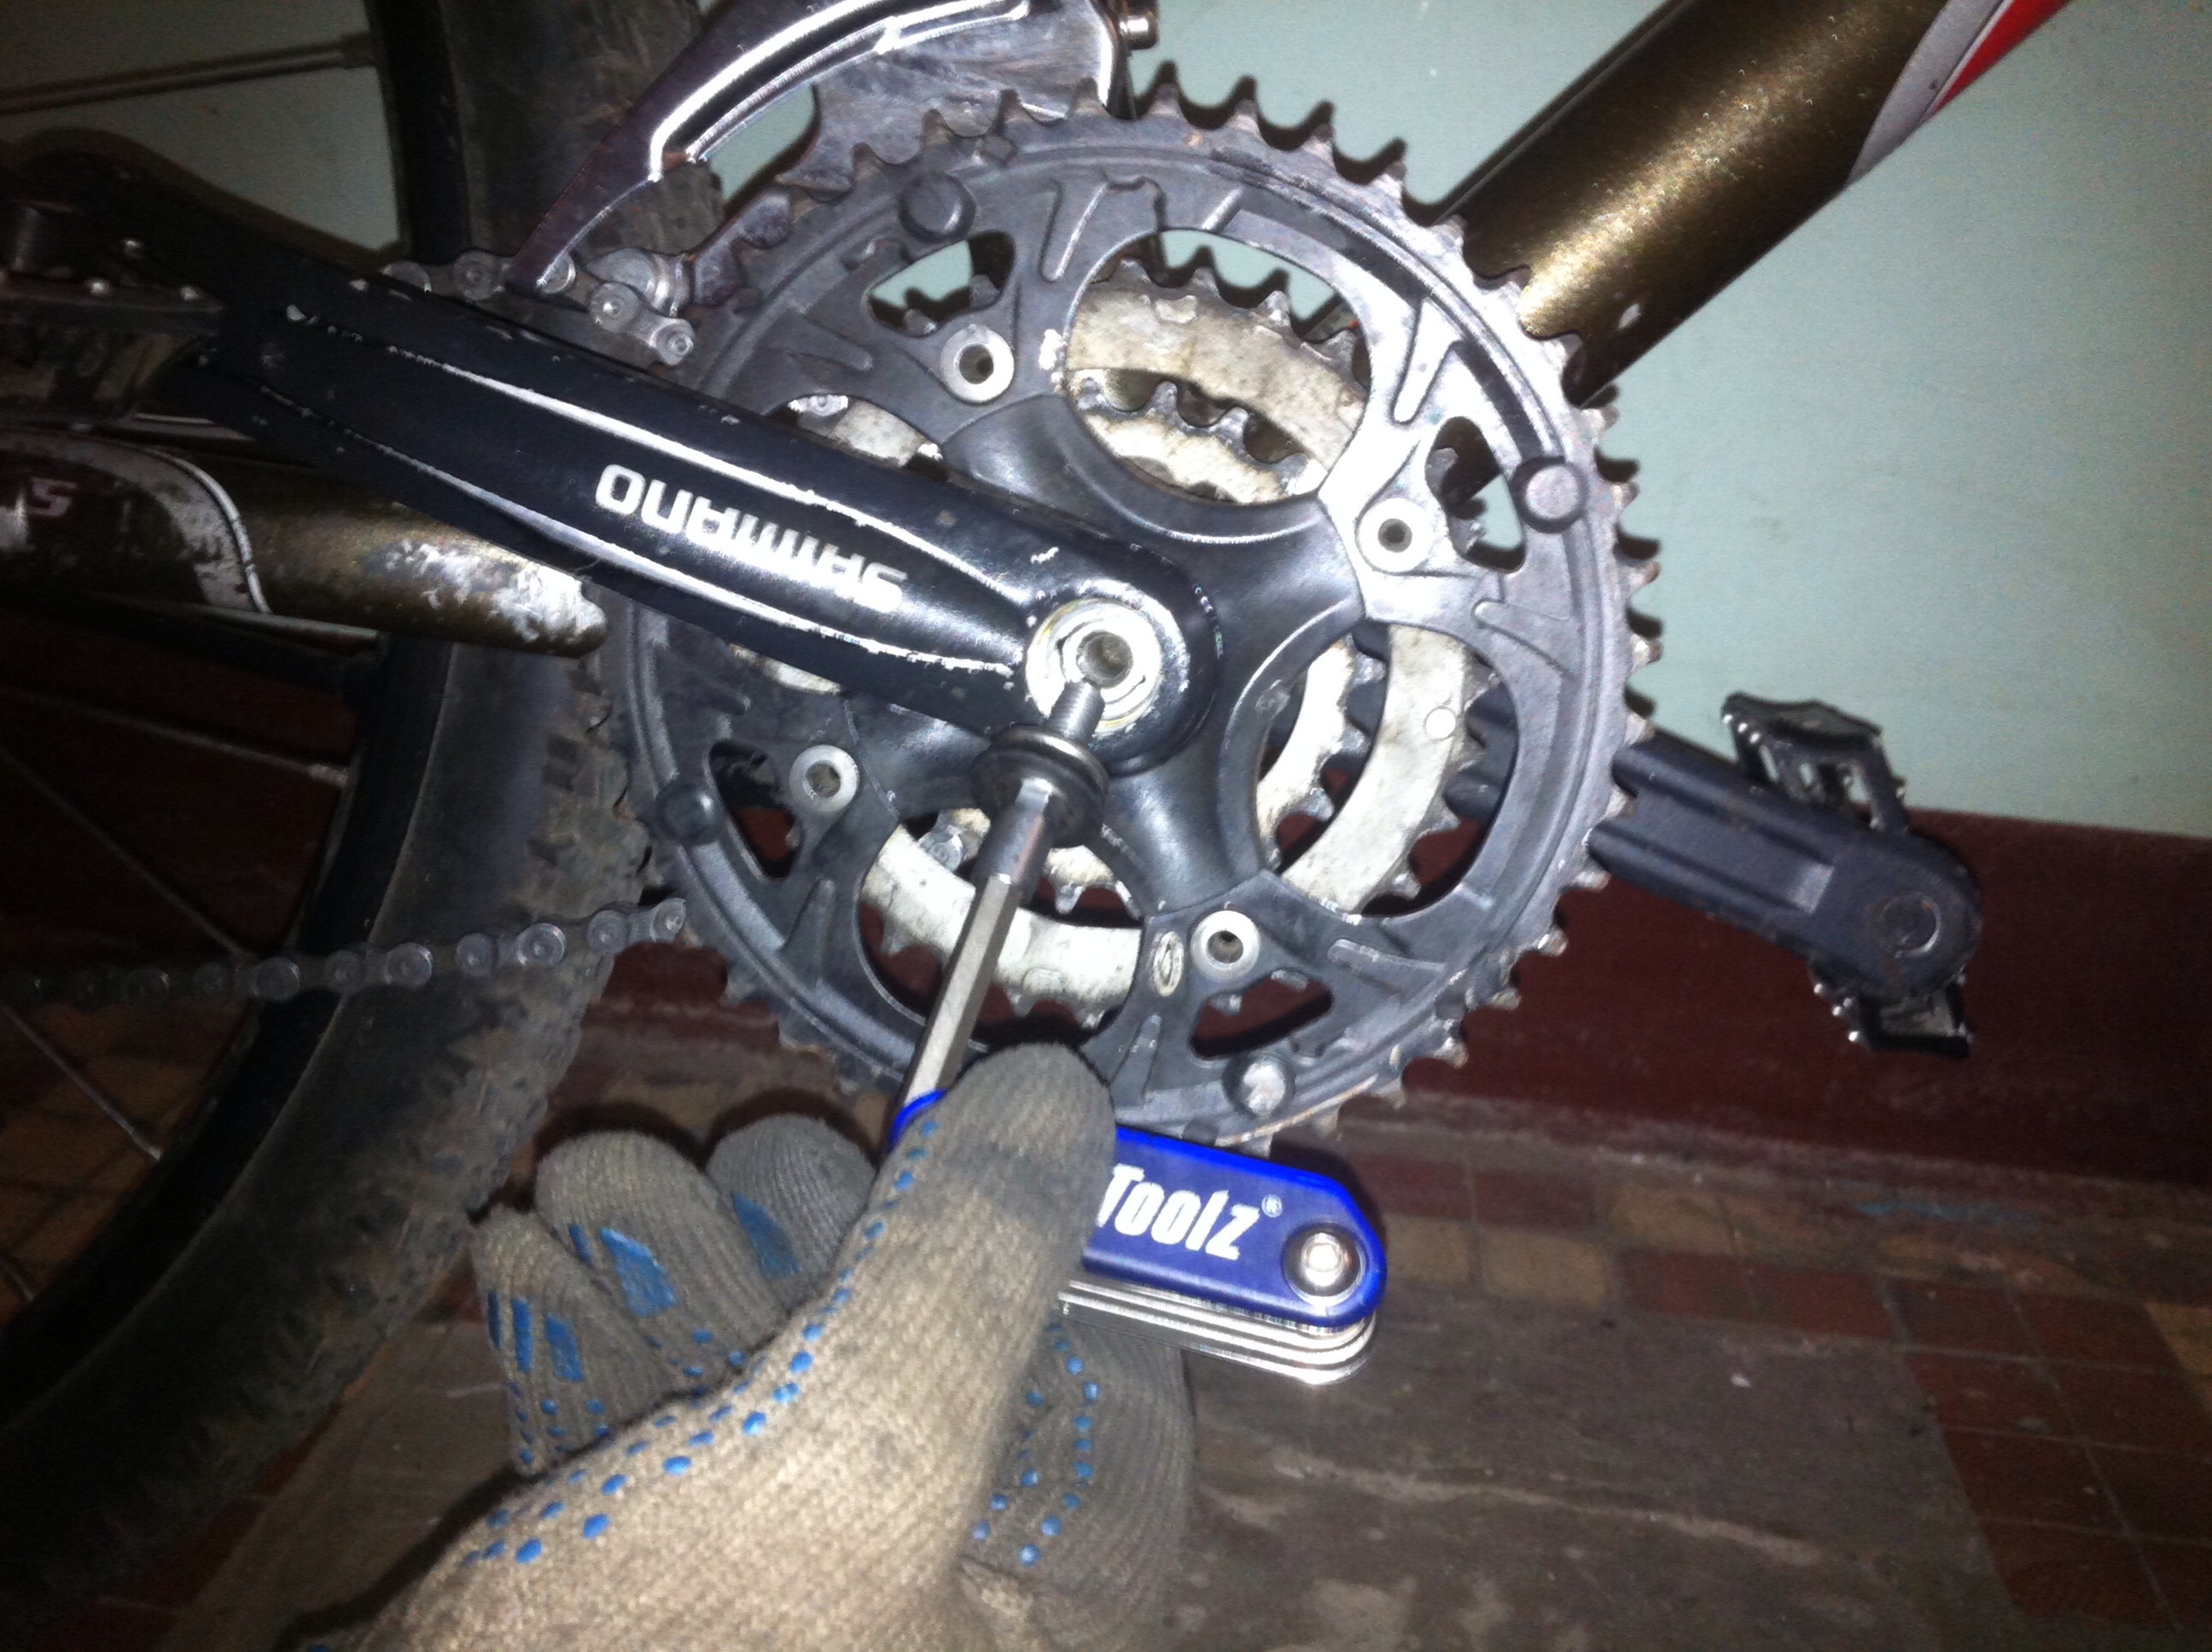
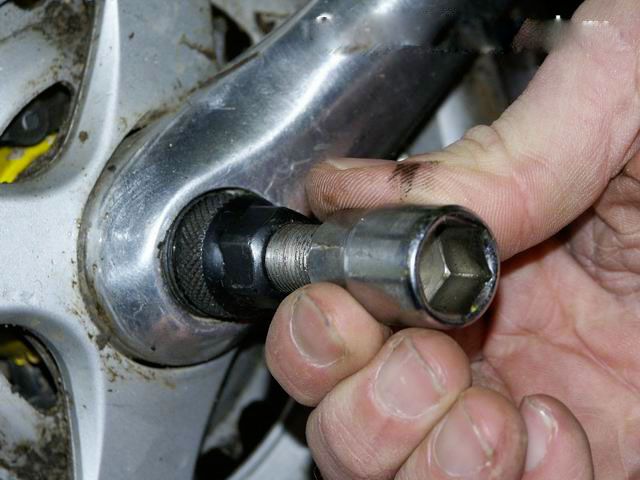
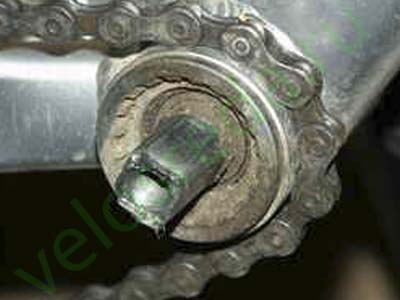
2. In the connecting rod itself there is a thread precisely in this thread you need to screw our puller (we twist it until it stops).
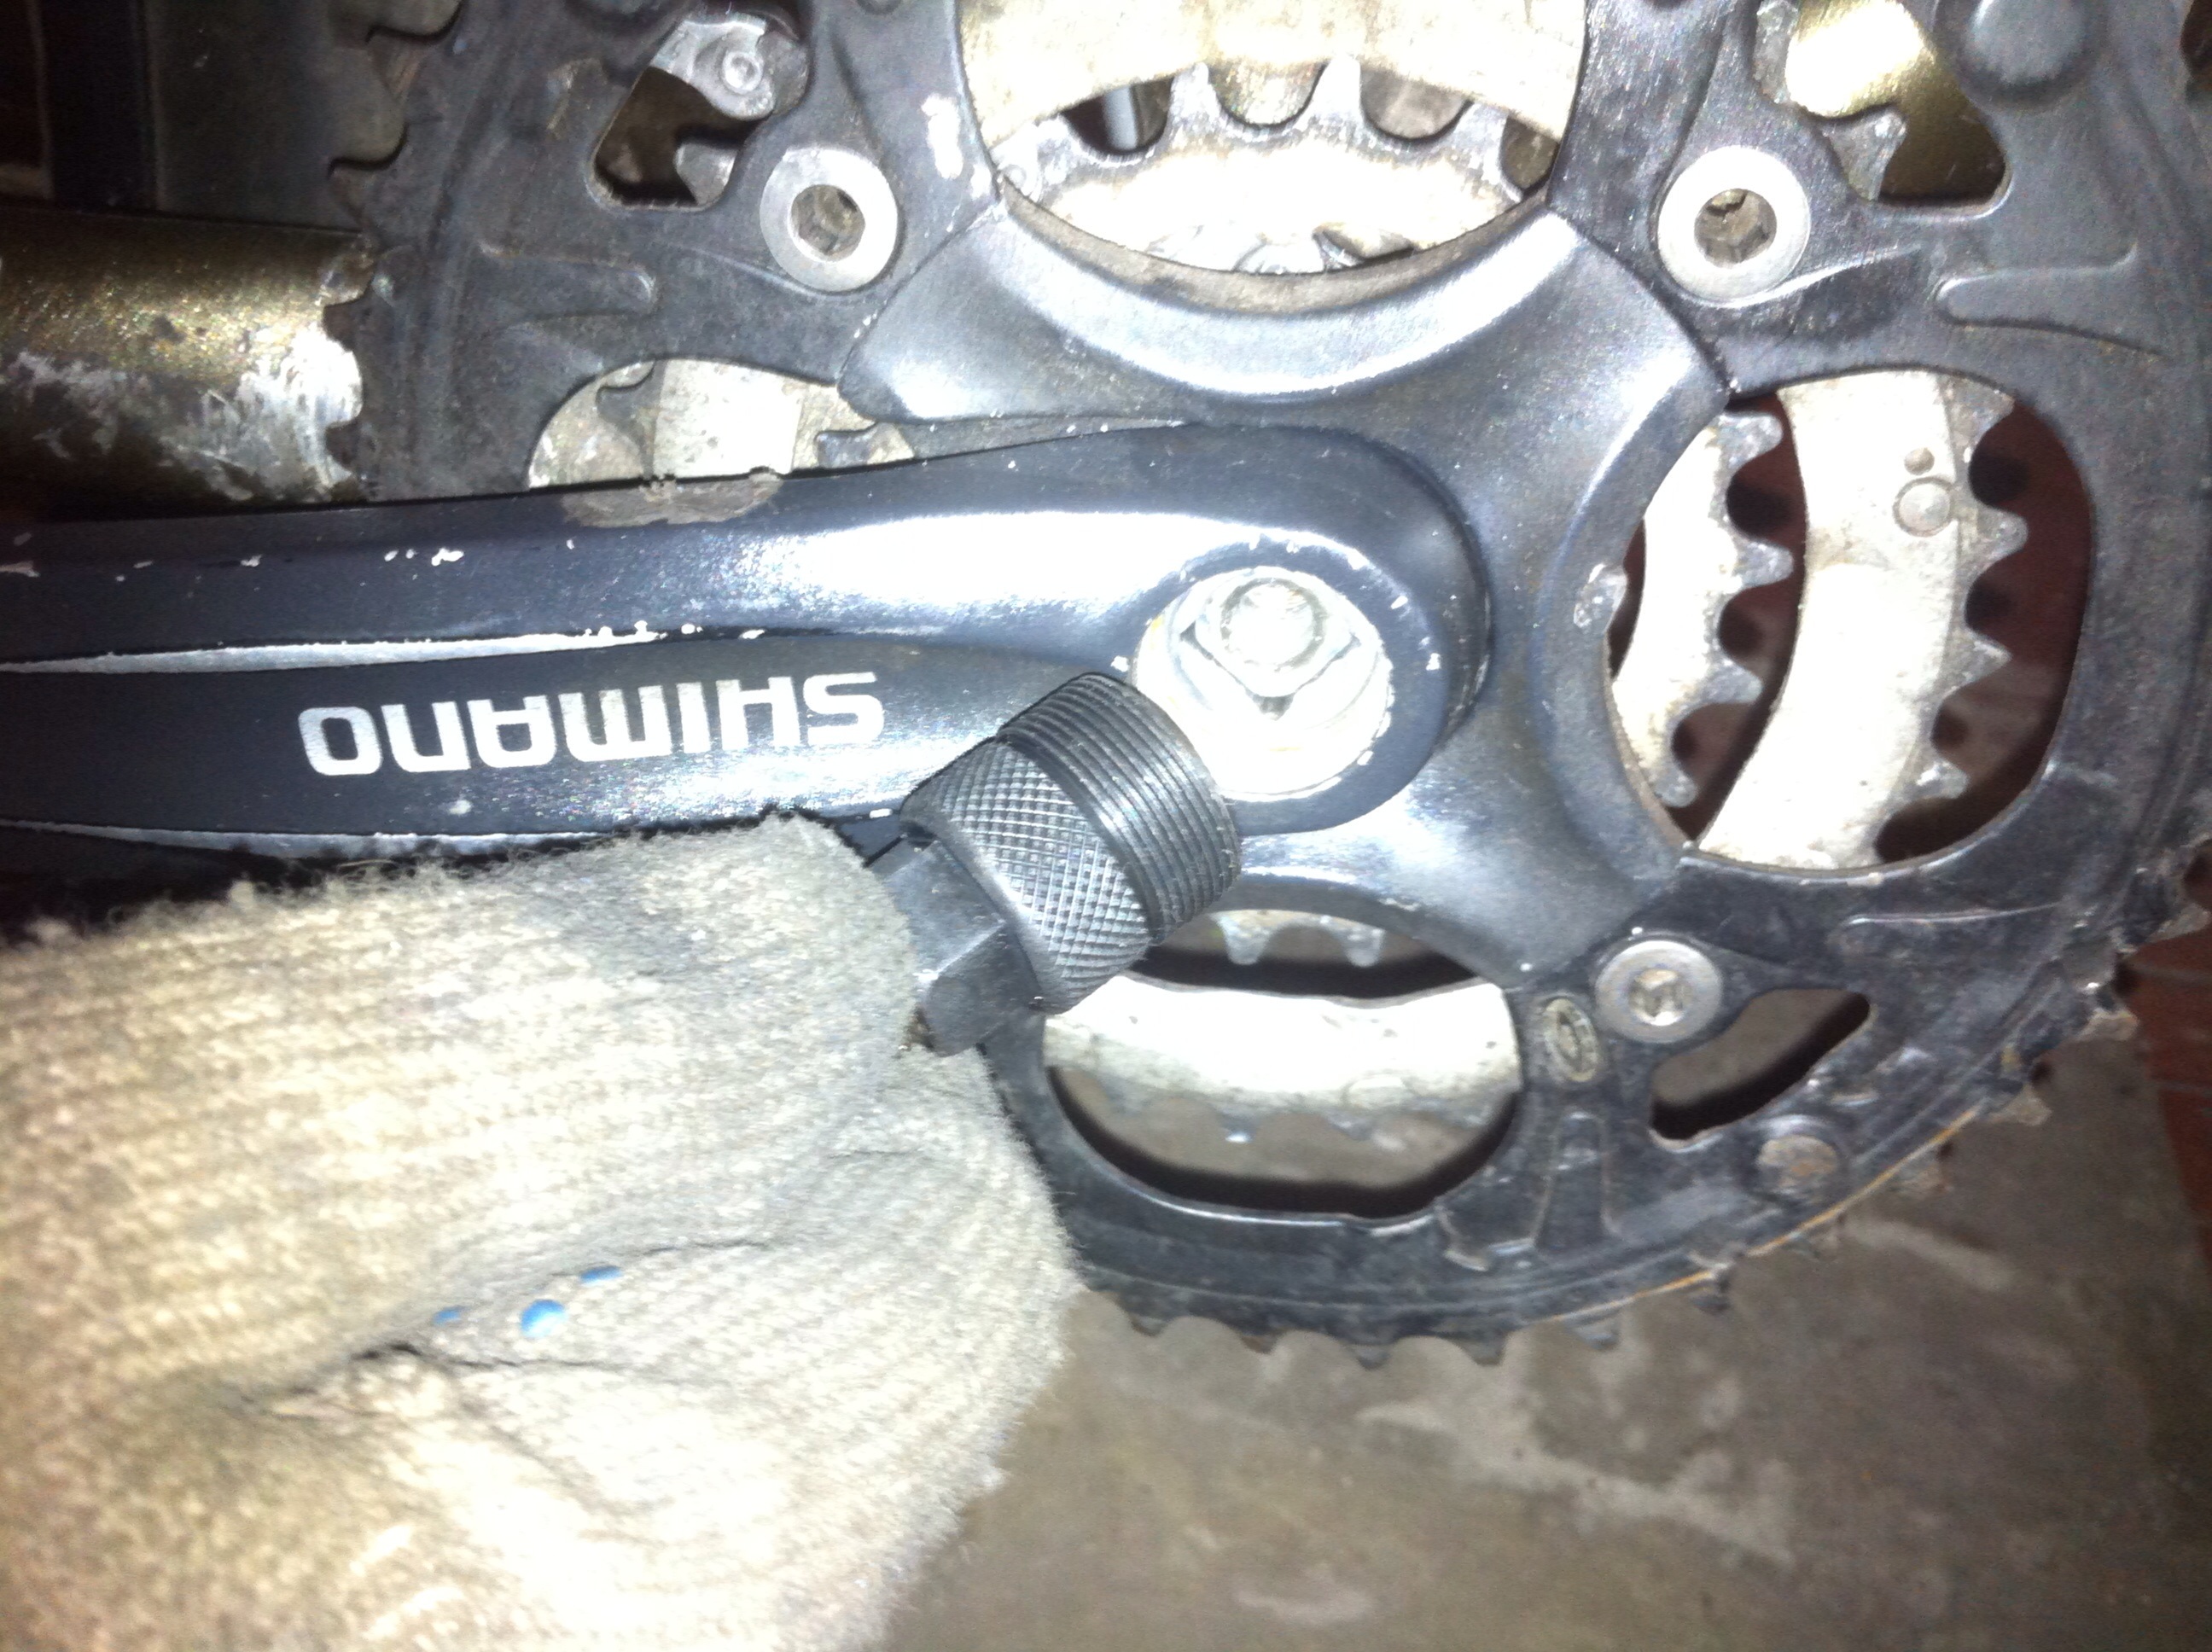
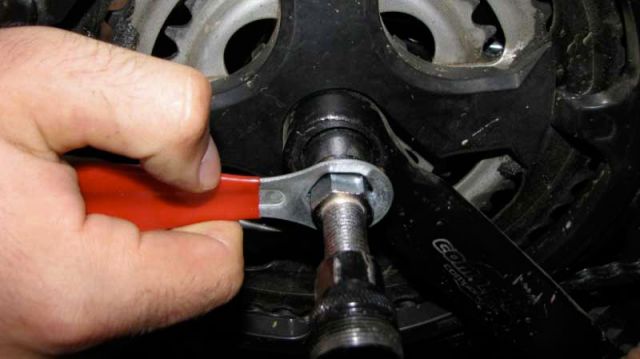
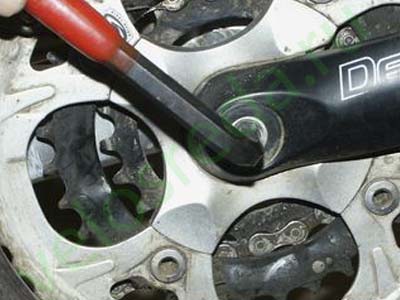
3. Once you have screwed the puller, you can begin to unscrew. There must be a place on the puller in order to insert the key or some pullers already come with a handle and you do not need the key. Rotating the knob counterclockwise, we start to press the carriage (axis) with the inside of the puller and thereby squeeze the connecting rod evenly from its seats.
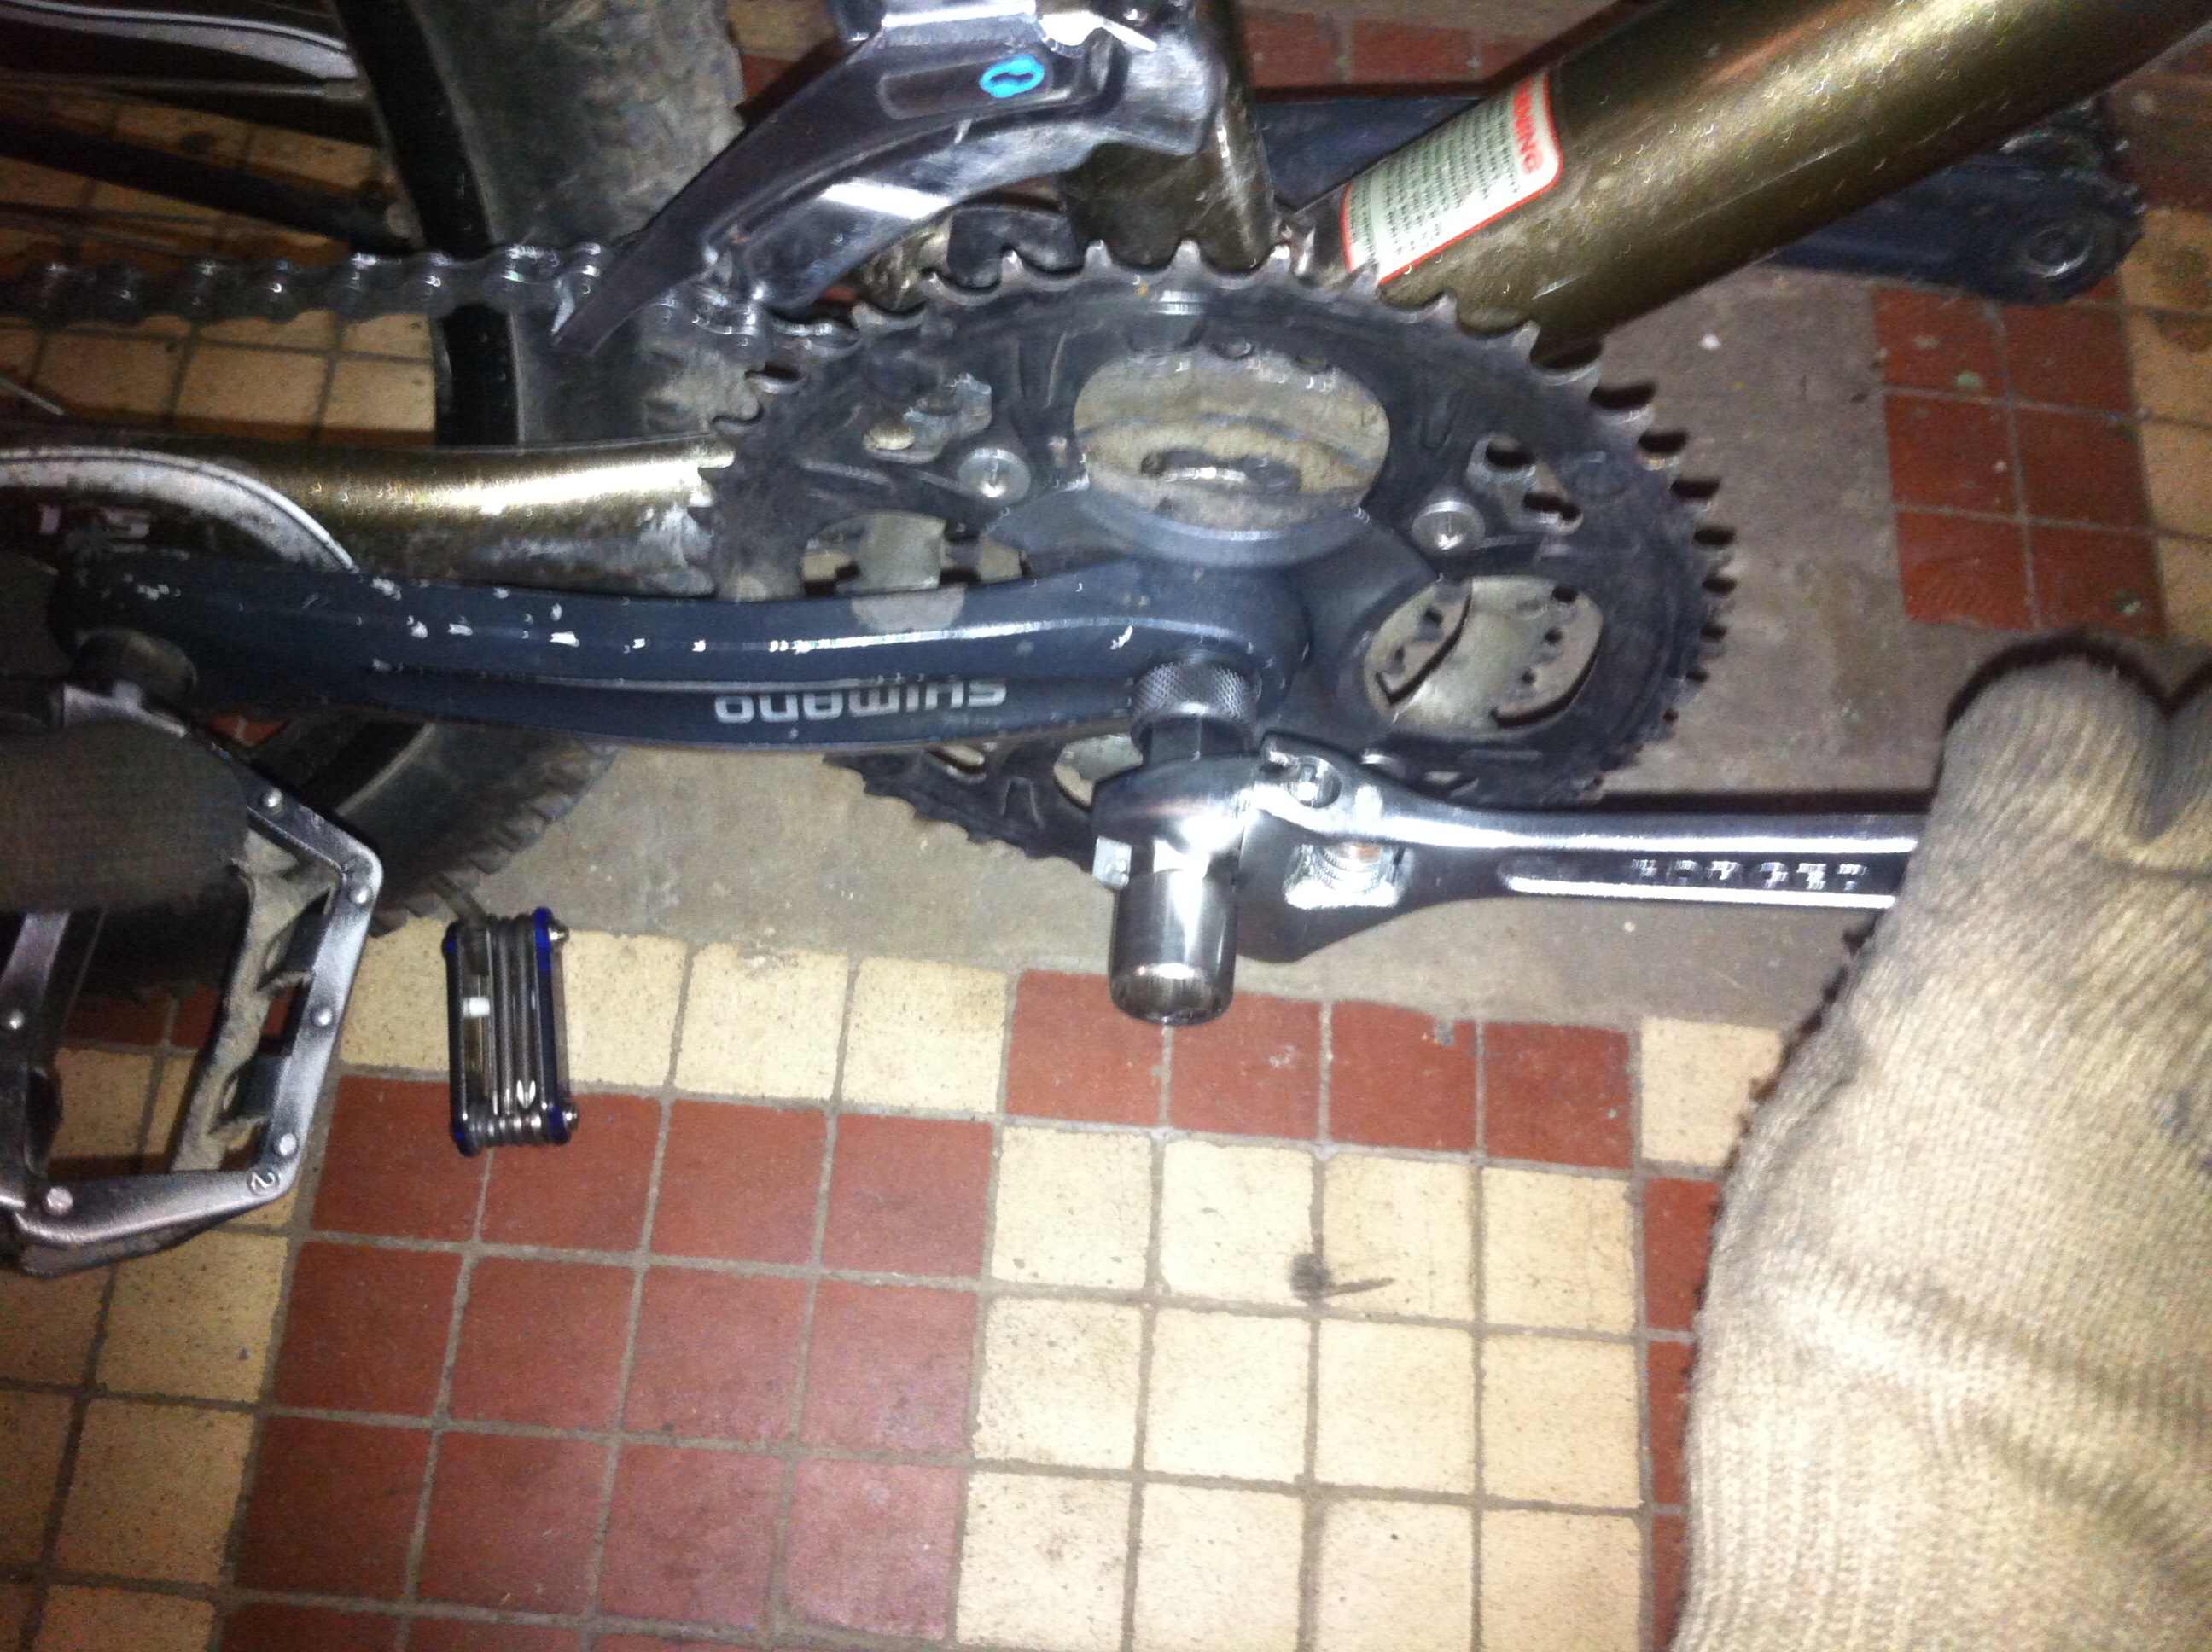
We twist until the connecting rod falls to the floor. Sometimes the connecting rods stick so hard that when unscrewing, you can break the internal thread on the connecting rod and then you will have to remove the connecting rod together with the carriage.
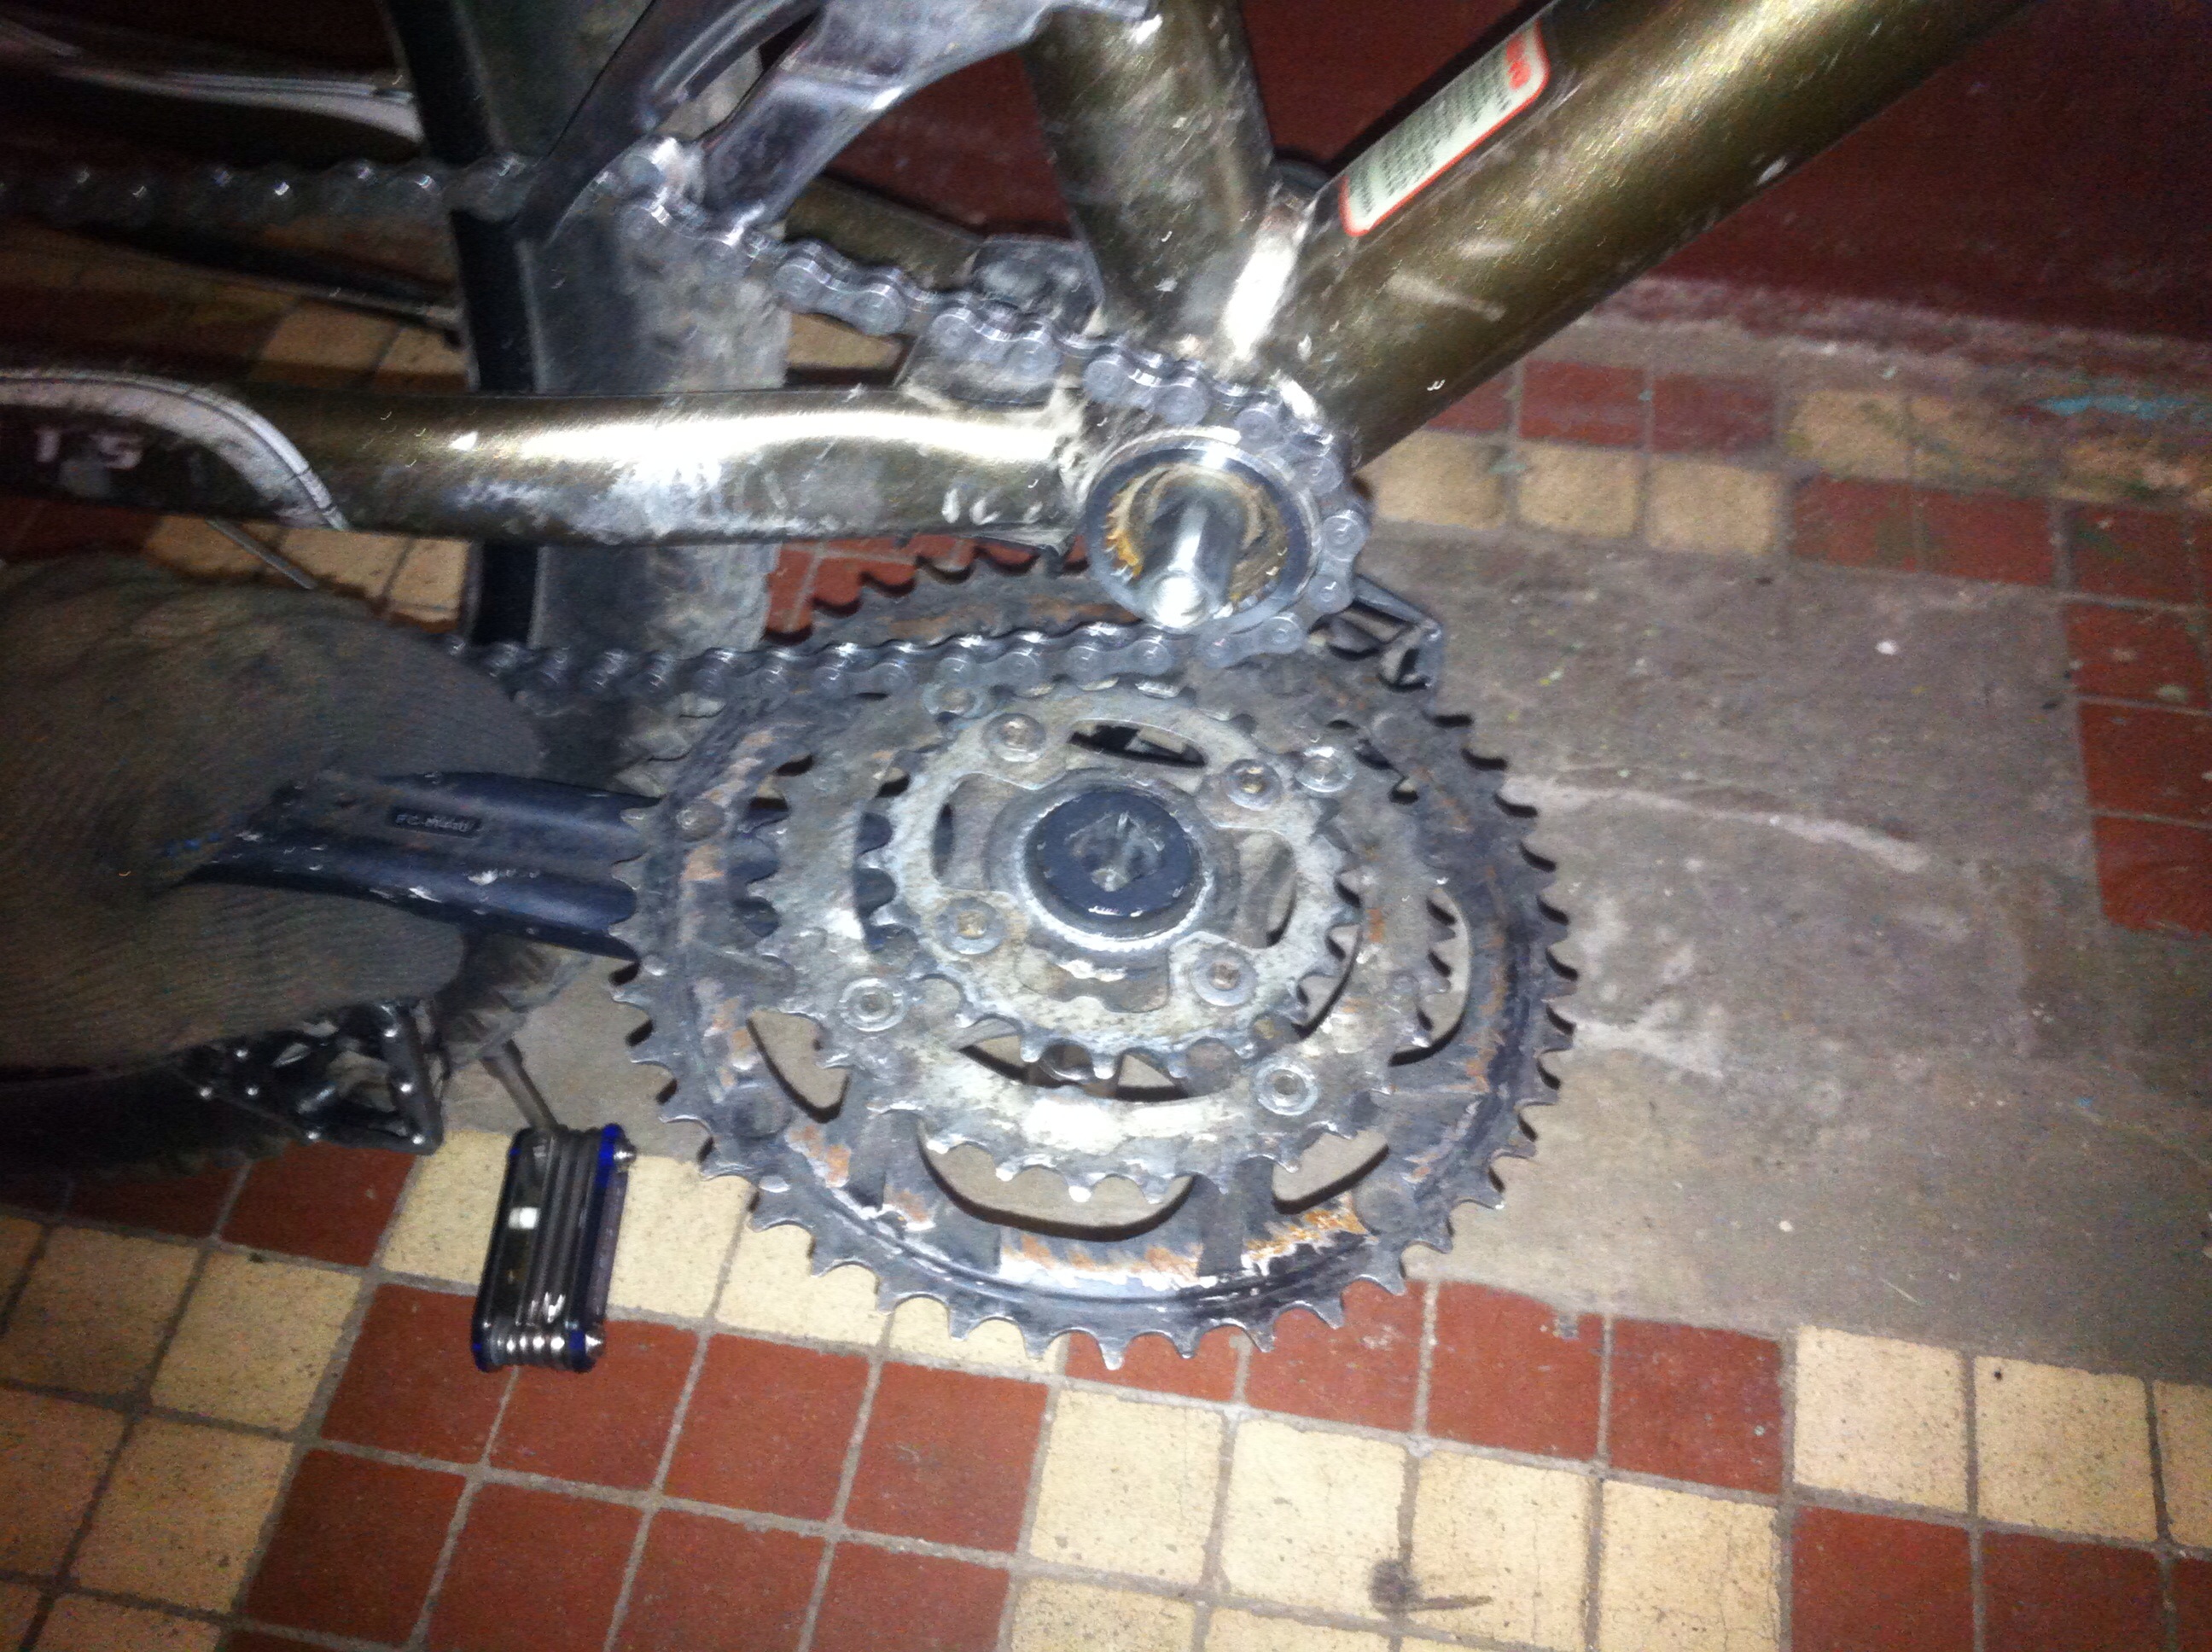
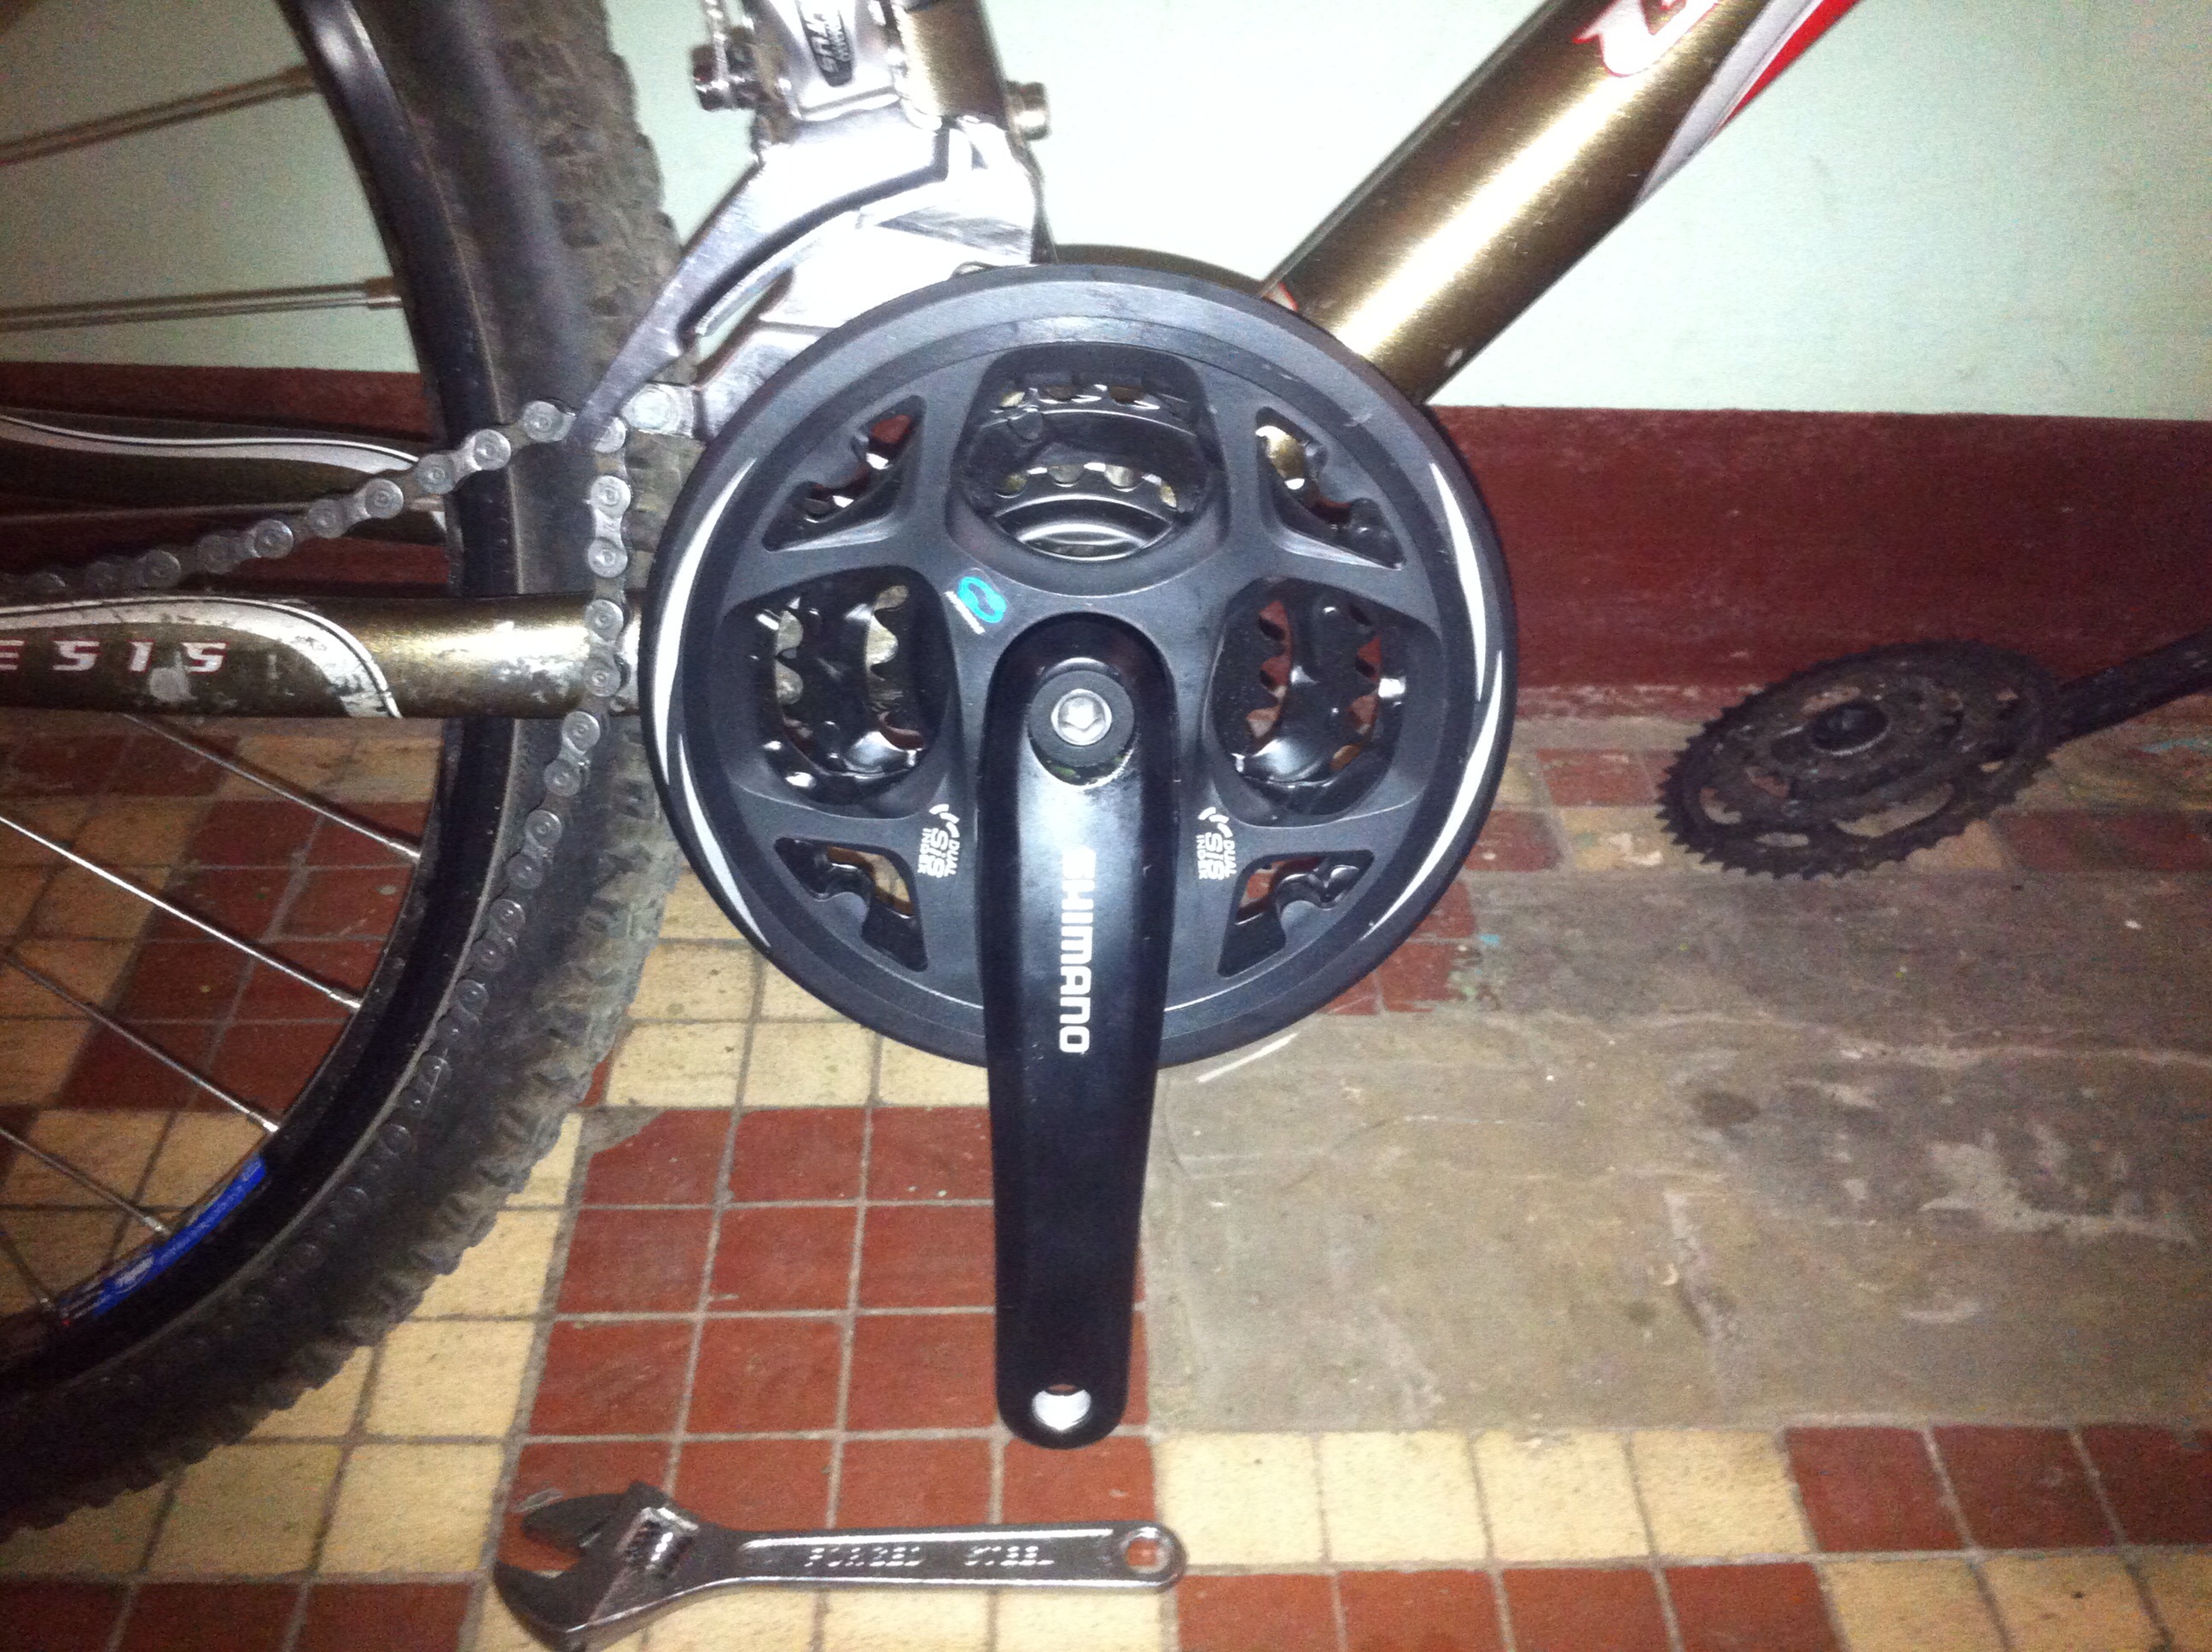
4. It is very simple to put a new rod (system). We install the spare part on the axis and with the help of the clamping bolt we securely fasten to the square axis of the carriage.
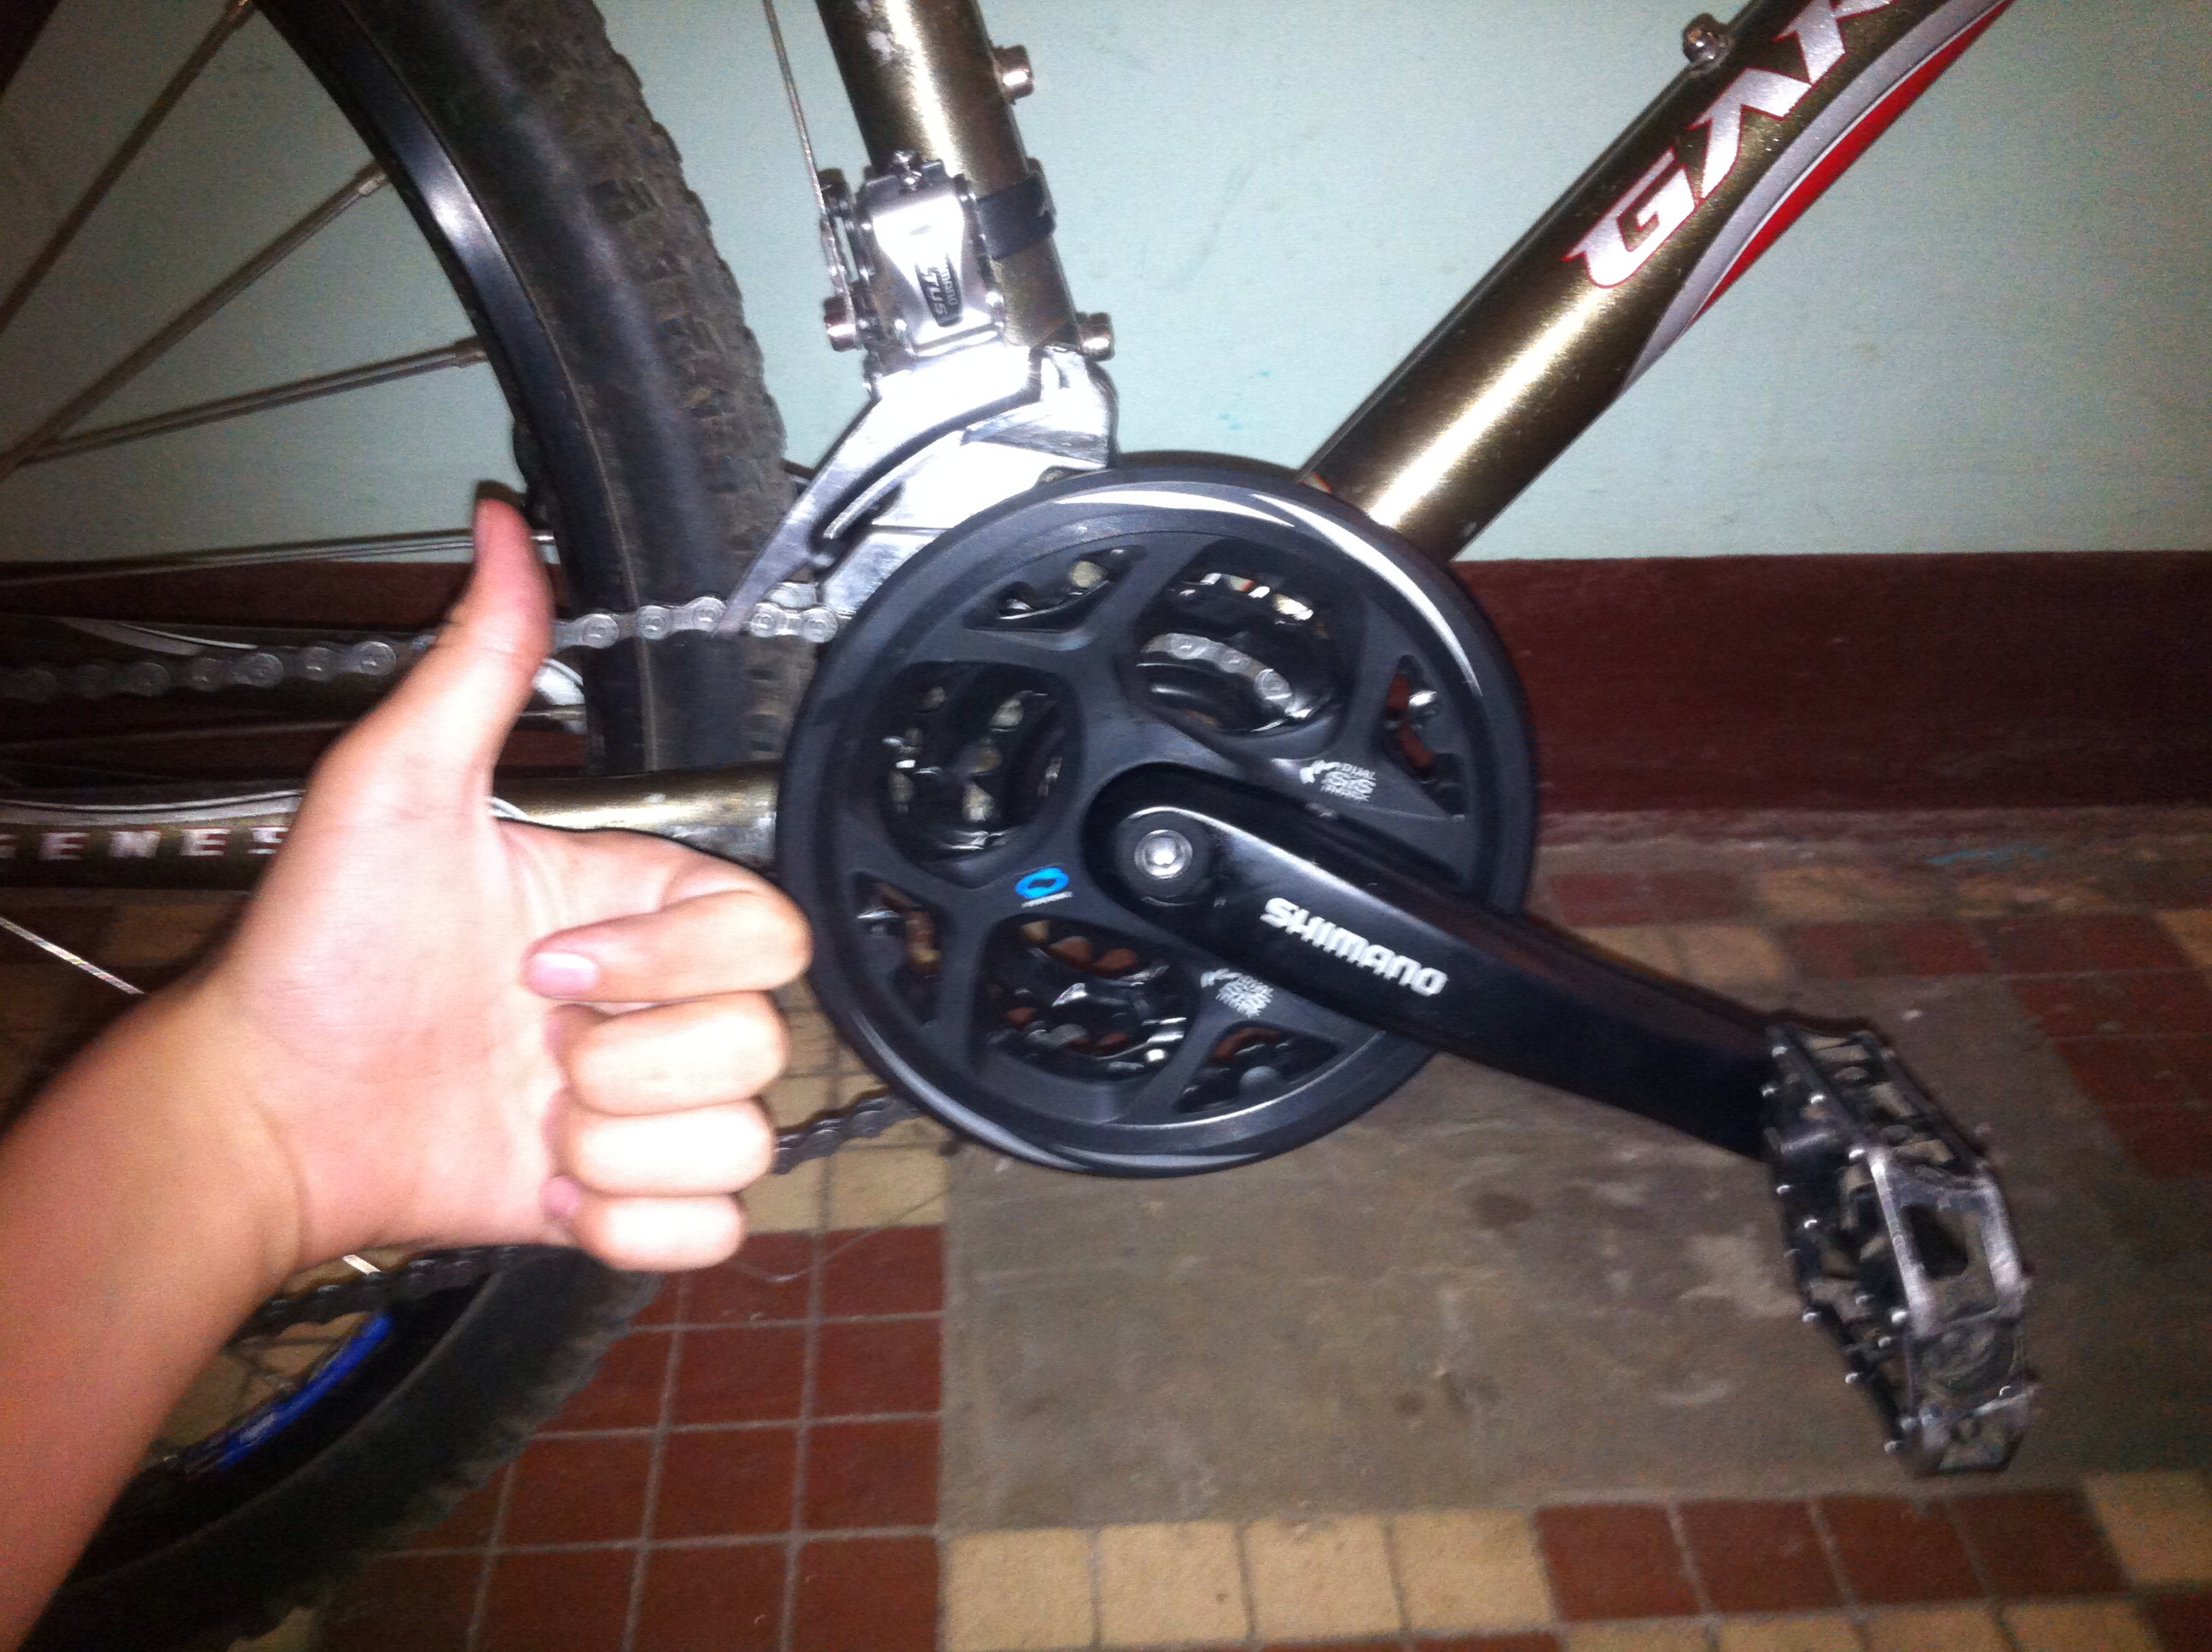
5. We do the same with the left connecting rod:

On this, our work on replacing or installing connecting rods with a system can be considered completed. And I almost forgot to install the pedals:

P.S. Replacing the connecting rods on carriages of a different type is fundamentally no different, except for using another puller in the work for the necessary carriage.
The question of how to remove the connecting rods from a bicycle without a puller arises in situations where it is necessary to dismantle the specified part for replacement and maintenance. To remove the nodal element in a professional environment, specialized pullers are used. However, if you wish, you can do without it. Let's figure out how to remove the bicycle rods without using a puller.
What are connecting rods?
A connecting rod is a part that has one of the most significant loads during movement. There are blocks of front stars that are connected to the connecting rod motionless. In this case, if breakdowns occur, both rods must be replaced. On bikes of the upper price category, stars can be changed by disconnecting from the connecting rod as it wears out.
Questions regarding how to remove the connecting rods from a bicycle without a puller begin to worry bike owners in the event of damage to these parts. It is necessary to dismantle the element in order to gain free access to the carriage when adjusting it.
Types of connecting rods
 Before you figure out how to remove the connecting rods without a puller, you need to consider their varieties and how to connect with the rest of the details:
- One-component - are presented in the form of a monolithic structure, where the left and right elements are stationary on the axis. The advantage of this solution is high reliability, ease of maintenance and low weight due to lack of fasteners.
- Two-component - the axis, the right connecting rod and the drive star are connected in a single design. The left connecting rod is connected to the system due to nut seating.
- Three-part - the most common option. It is presented in the form of a separate axis, as well as a right and left connecting rod connected to an asterisk.
Materials of manufacture
During movement, the cranks have the highest load. Therefore, solid steel is most often used as the material for their manufacture. Recently, products made from aluminum alloys have been in high demand. Most often, such solutions are used to complete sports bikes, where the reduction in total weight plays a decisive role.
Types of Mounts
To understand how to remove the connecting rods from a bicycle without a puller, it is important to understand the types of mounts that are used to connect the part to the stars. Modern products can be installed using nuts, slots or fasteners made in the form of specific squares. A rotary connection method is also available today.

In what situations may the connecting rod need to be dismantled?
A connecting rod is a fairly simple part that does not require special maintenance and care. Component replacement is most often done due to mechanical damage. The need for removal may also arise when it is necessary to gain free access to the carriage, to perform adjustment or flushing the system.
Often, after riding in rainy weather, unpleasant creaks occur in the area of \u200b\u200bthe carriage, caused by the ingress of sand and dirt into the nodal mechanism. In this case, it may be necessary to remove the connecting rod to clean the seat.
In general, the connecting rod itself is not dismantled. To do this, resort to the operation of a special puller or the use of improvised methods, which will be discussed later.
Remove the connecting rods from the bike without a puller
In cases where the cyclist does not have access to a specialized tool, there are relatively few options for implementing the task. To remove the connecting rods from the bike without a puller, you can resort to the following solutions:
Connecting Rod Installation
After dismantling the part and performing all the planned manipulations, it is necessary to return the structural element to its original place. Before carrying out the work, it is desirable to clean all surfaces and joints, and then carry out their processing with a thick lubricant. Such an approach will allow to install the connecting rod evenly and will significantly facilitate the work if it is necessary to dismantle it again.
During installation, it is necessary to perform a deep fit of the part on the shaft. This will avoid the appearance of backlash during movement. If the connecting rod is not tight enough, the nest will gradually become unusable. For reliable fixing of the part, application of a force of the order of 50-70 Nm is sufficient.
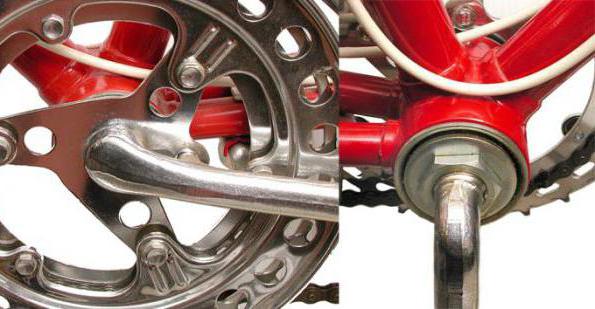
A bicycle connecting rod (foot pedal) is a familiar and significant part of a transmission. It is a link in the transfer of effort to the carriage shaft and chainring. The good condition and reliable fastening of the connecting rods to the carriage guarantees maximum torque transmission efficiency and driving safety.
Bicycle rods: general
The bicycle transmission has a pair of connecting rods located on both sides of the carriage. Parts are mounted on the carriage shaft using special mounts. Depending on the manufacturer and type of bike, the mounts differ, and we’ll definitely talk about this later.
The connecting rod pair together with the front stars form the system. It can be collapsible and non-collapsible. The first type is found on budget models of bicycles, including single-speed road. Here the wear of the sprockets develops simultaneously with the fatigue of the material of the levers. In case of premature failure of the connecting rods, the system must be completely replaced.
According to the standard, the stars are located on the right in the direction of travel, therefore, the right connecting rod is fixed to the stars. On medium and high level bikes, sprockets can be changed separately from the connecting rod pair. It can be removed and, thus, replaced only part of the system - worn stars.
Detachable mountain bike system
The connecting rod and carriage are the most loaded nodes of the bicycle transmission, as they directly take the rotational and rotational forces from the legs of the cyclist. In the manufacture of parts used materials:
- hardened steel;
- aluminum;
- titanium;
- carbon fiber (professional road bike).
A significant role in the dynamics of movement is played by the weight and shape of the connecting rods. Manufacturers try to make them as light and compact as possible. So, to reduce the weight inside the part, cavities are specially made. The idea belongs to the Japanese manufacturer Shimano:
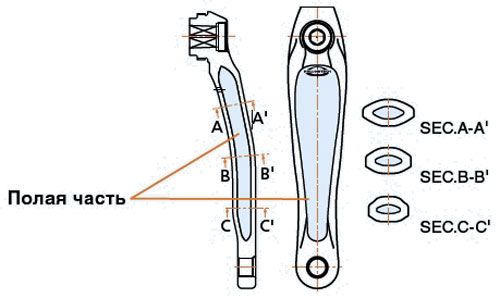
Hollowtech internal cavities
Disassembling the system with an ordinary wrench does not work, for this you will need a special connecting rod puller. When the tool is pressed in, the part loosens freely from the axis of the carriage without damaging it.
Types of connecting rods and methods for their fastening
The dynamics of cycling depends on many factors, including the length of the pedal levers. Sizes range from 150 to 185 mm. The longer the connecting rod, the lower the cadence and the greater the pulling force, and vice versa. This pattern helps to choose the optimal size for a comfortable ride.
On racing bicycles, extended levers of more than 177.5 mm are placed; on track models, shortened parts are preferable. Traditionally, the length of the connecting rods on an adult bike ranges from 165 to 185 mm. Teenage, children's and track models are equipped with short levers from 150 to 177.5 mm in size. The range 165 - 177.5 mm can be considered a kind of universal for all models.
Type of connecting rods according to the method of installation and dismantling:
- monolithic (one-piece) - levers are integrated with the carriage shaft (BMX and children's models);
- two-part: right connecting rod + sprockets, left lever separately;
- collapsible: the right connecting rod is bolted to the stars, a common design on most models (you can disassemble the system and replace only worn stars or levers).
Mounting to the carriage shaft happens:
- under the wedge (rhombus) - obsolete design found on older models and children's bicycles;
- square - fixation on the square tips of the axis, tightening is carried out with the help of nuts inside the input cavity of the lever, plastic protection boot is installed outside (found on budget road bikes);
- hexagon - installation and fixation of the connecting rods using a hex wrench (a common design on high-speed models);
- spline: the axis has a through cavity, the diameter of the mounts on the connecting rods is increased, the levers are mated with grooves on the shaft (splines) and tightened with hexagons.
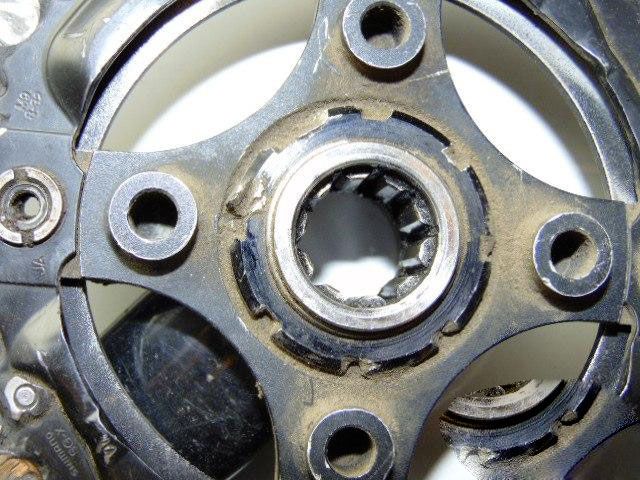
The slot mount is not unscrewed by a conventional puller
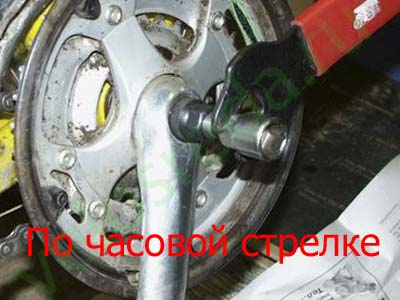
What thread is cut into the connecting rod pair and in which direction do you turn the puller when disassembling the system? The thread on both levers is right: untwisting against, twisting - clockwise.
There is a pedal hole on the outside of the lever. The traditional size of the key for removal and installation is 15 mm. The pedal thread is directed only in the direction of travel. In the kit, the pedals are marked with the letters R and L. Put the left pedal on the right connecting rod and vice versa will not work.
Dismantling and installation of connecting rods
Why remove the connecting rods? There may be several reasons:
- change worn stars on a collapsible system;
- bulkhead and carriage repair (removal of levers is only a prehistory);
- pulling up (it will be more effective with full removal and installation).
Working process:
1. Remove the protective cap.
2. Insert the puller into the cavity and twist the fixing nut. If the nut goes bad, sprinkle with WD-40 or other grease. In the case of a bus mount, we select the appropriate key.
3. Insert the puller into the connecting rod with the other end and screw into the thread until it stops.
4. Tighten the tool bolt with a wrench.
5. The connecting rod is extruded from the shaft.
6. We do everything that is needed and proceed to the reverse installation.
7.Clean and grease the mounting point of the lever to the axis of the carriage.
8. Put the connecting rod on the shaft, insert the puller and tighten it in the opposite direction.
9. Put on the fixing nut and plug.
Attention! Tighten as tight as possible, otherwise the connecting rod will play during riding.
A fairly transparent question is how to remove the connecting rods if you have a puller on hand. This process looks much more interesting without using this tool.
A few artisanal methods:
- Twist the fixing bolts and roll the bike for a walk. With prolonged maximum load, the connecting rods should fall off themselves. True, there is a risk of damaging the mounts.
- Hammer with a screwdriver. Wrap the tip with a soft cloth. Direct hits in a counterclockwise direction. Do it very carefully, otherwise you may damage the threads and bearings of the carriage.
- Incise and disrupt the mount. Barbarian method for removing faulty parts.
Which of these methods to choose? The most correct decision is to buy a new puller, all the more it is inexpensive.
The system device is quite simple, and change its components really independently. To remove the connecting rods you will need a puller and some free time. An important role is played by monitoring the state of the system in order to change worn components in time. Therefore, do not forget to conduct a visual diagnosis of your bike.
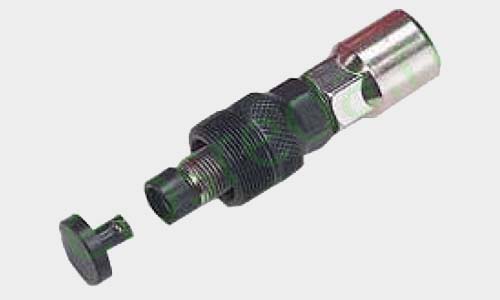
To remove the connecting rods you will need a special key - the connecting rod puller. It is a screw with a two-section head (socket wrench and face spanners), on which a specially shaped nut is screwed with internal and external threads. Often an adapter is attached to the puller for use with splined joint carriages.
When buying new connecting rods, you need to consider their method of attachment to the carriage. It can be square or slotted (slotted joints of several standards). It is also important to consider the length of the connecting rod when choosing a new one, if you buy too long connecting rods, they will touch the obstacles when driving over rough terrain, and when short, additional efforts will be required when pedaling.
Removing Bicycle Cranks
1. Remove or unscrew the boot cap.. Some plugs are enough to pry off with a screwdriver, and some will have to be twisted.
![]()
2. Remove the bolt (or nut) which pulls the connecting rod to the carriage and remove the washer (if any). To do this, you need a ring wrench (usually at 14), or an 8 hexagon for a square connection or a 10 hexagon for a spline connection.
3. Take the connecting rod puller and unscrew the inner screw completely.
Please note that with a square connection, the inner screw should be narrower and the adapter pad must be removed (if it is worn), and with a spline wider, the adapter pad must be put on accordingly. Be careful, there have been times when people did not remove the pad, as a result, it rested on the connecting rod itself, and not on the carriage axis. As a result, they tore the thread on the connecting rod.
4. Screw the puller into the connecting rod. Screw the puller all the way, otherwise it may break and damage the thread.
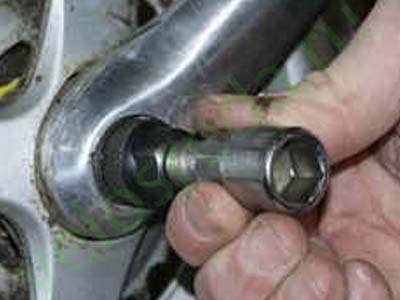
5. Tighten the internal screw of the puller with a wrench. Twist it clockwise and you will see how the connecting rod comes off.
6. After removal of a rod unscrew the puller.
If the connecting rod does not lend itself in any way, do not exert too much force, otherwise you can break the thread and then it will be even more difficult to remove it. Fill the connection with oil or WD-40 and try again. When the connecting rod puller is not at hand, you can unscrew the bolts tightening the connecting rod and the carriage and drive a few hundred meters without them. After the connecting rod should be easily removed, if lightly tapped on it with something weighty (through a wooden block or stick). You can also heat the junction of the connecting rod and the carriage, but do not use any burners for heating, they will harm the connecting rod, heat it with boiling water.
And one more thing, if you need to, then it is better to unscrew them before removing the connecting rods, it will be easier.
Before installing the connecting rods, clean the joints on it and the carriage from dirt. Then lubricate the inside of the connecting rod with grease.
Put the chain on the carriage assembly (when installing the right connecting rod), put the connecting rod on the axle and tighten the tightening screw.
Putting on an opposite rod do not mix up its position.

Tighten the bolts very tightly. If it is not enough to tighten them, then backlash can form during the ride.
Put anther caps and a chain on an asterisk.
Cranks installed.
At first glance, the design of the pedal looks simple, but to dismantle it you need to have certain knowledge and a set of tools.
Removing the bicycle pedals may be necessary for various reasons: before transporting the bicycle, for regular inspection for preventive purposes, or after you, before the start of the season. There are situations when a part crunches or makes other atypical sounds, in which case it must either be cleaned or completely dismantled, replaced with a new one. Pedal nodes of new vehicles often need additional adjustment for a specific person. Therefore, many people have the question of how to pedal the bike.
Before you remove the pedals, first you need to get acquainted with the structure of this site. These actions must be performed before any such operations. The pedal consists of several elements, and each model can have a different design, namely:
- axis - This is a special pin made of metal, which is screwed into the connecting rod. It is the basis for the rest of the details;
- platform - a flat surface in direct contact with the sole and located at the end of the axis;
- bearings - the elements necessary for connecting the previous parts into a single mechanism, namely they allow the platforms to rotate;
- hardware - A variety of bolts and nuts that hold together all the components of the pedal. When disassembling, the fasteners are unscrewed with special tools.
Depending on the platform, the pedals are divided into two groups: contact, in which it is assumed that there is a special mount for bicycle shoes, and standard models.
Removing simple devices is effortless, and contact mechanisms with more complex clamps are not so easy to dismantle.
The necessary set of tools and materials
Before you figure out how to remove the pedals from the bike, you must collect all the tools at hand that will be needed during the performance of these works.
Interesting! These tools should always be at hand with the cyclist so that he can carry out repairs on his own. Buying them is at the stage of choosing a bike for or.
List of materials that may be needed:
In addition to the above items, pedals are useful for removing:
- lubricating fluid - all dismantled parts must be cleaned and lubricated to improve operating properties and extend the life of the device (you can use the same tool as for);
- rags - used to cleanse all elements;
- solvent - it is applied in the presence of extensive dirty areas or problems with unscrewing elements. Its analogue is kerosene.
A special stand that fixes the vehicle in the air will help facilitate the process of removing bicycle pedals. However, some cyclists argue that so, you have to put more physical effort.
Step-by-step instructions on how to remove the pedal from the bike without a puller
After completion of the preparatory work, we proceed to dismantle:
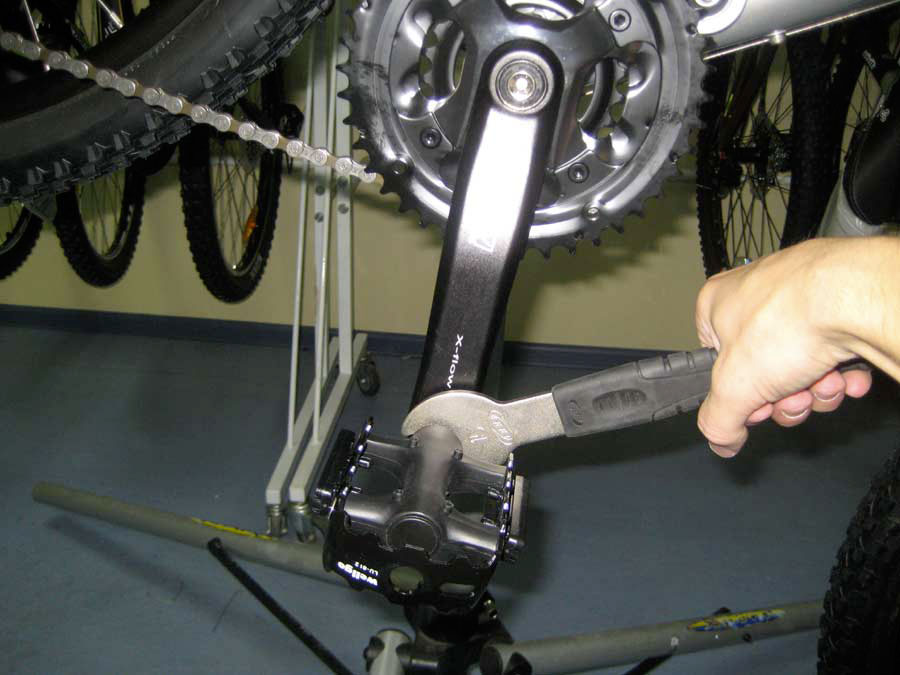
- First of all, move the system towards the steering wheel, this position is considered working.
- Carefully unscrew the pedals from the connecting rod using an adjustable wrench. Which way to pedal the bike? Right - counterclockwise, left - in the direction.
- Remove the end cap to allow access to the lock nut. Use a small flathead screwdriver for this action.
- Gently unscrew the nut, holding the axis with the second key.
- Also at the end there is a washer that needs to be removed.
- At this point, unscrew the cone.
- It remains to remove the platform from the axis, try to control the position of the bearings to prevent their sudden fall.
Note! Each pedal has a unique thread. The axis of the right pedal is unscrewed counterclockwise, and the left - vice versa.
Difficulties during dismantling arise due to external factors or heavy loads. There are two options for solving such problems:
- treat the elements with kerosene or solvent. After soaking in such liquids, dirt that impedes rotation is easily removed;
- the axle and connecting rod can be heated, a slight deformation of the metal will occur, and the axis can easily be removed by thread.
Important! To avoid damage to the thread, the manipulations with the axis are carried out extremely carefully, otherwise the next dismantling will be difficult.
In general, the process of removing the pedals is quite simple, it is much more important to prepare the necessary tools and materials, as well as follow the instructions. It is recommended to manually return parts to place first, and only tighten with special keys at the end.
Video
See how to pedal the bike properly. The video will show the entire process in detail.